Setting Up Filezilla 2.2.9
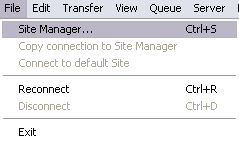
If the Site Manager window is not already displayed, from the File Menu
select Site Manager.

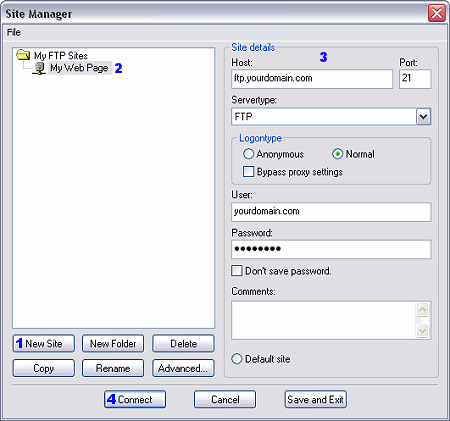
This is the area where you set up your FTP account information.
Click on the New Folder button and type in a name for the account.
Fill in the Host field. This is something like ftp.yourdomain.com where
yourdomain.com represents your actual domain name.
Use your actual domain name for the Username as well.
Type in your password.
Optionally, you may click on the Advanced button and browse to the
folder you keep your web site files in on your hard drive.
Click the Connect button to connect to your web space on Active Web
Hosting's server.

Transferring Files In FileZilla:
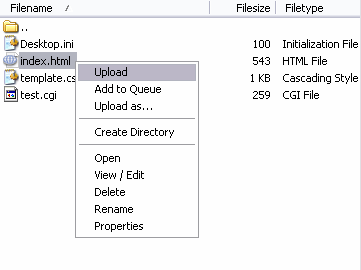
To transfer files from your hard drive to your web space, first select the files
you wish to transfer from the left side. Hold down the CTRL key and click
on additional files you wish to transfer. Right click on the selected files and
choose Upload. The uploading of the files should start automatically.

When you are done transferring files, disconnect by clicking the Disconnect
Icon, which is the third icon from the right on the toolbar.
Using Other FTP Commands:
Changing Folders: If you wish to transfer files to another folder in your
web space, double-click on the folder in the web space window.
Deleting Files: To delete a file, right click on the file and select
Delete.
Renaming Files: To rename a file, right click on the file and select
Rename.
Creating A New Folder: Right Click in the web space window and select
Create Directory. Type in a new name for the folder.
To Change File Permissions or use CHMOD: If you are installing a file that
requires certain permissions to be set, right click on the file to change and
select File attributes.
|

