Uploading Your Web Pages Using Macromedia DreamWeaver MX 2004
Setup Procedure
You will only have to do this setup procedure once to set up DreamWeaver to use
your FTP account.
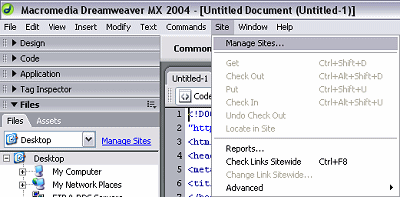
Click on the Site menu and select Manage Sites...
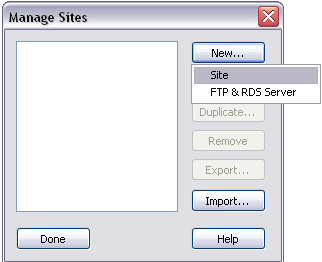
Click on the New... button and choose Site
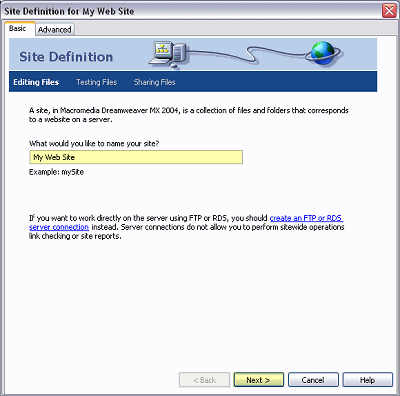
Be sure the Basic tab is selected, and Editing Files is also
selected. Type in a name to describe your web site connection.
On the next screen, choose No, I do not want to use server technology.
and click the Next button at the bottom of the screen.

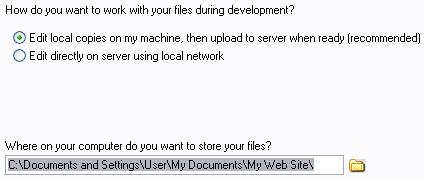
Select the first option to upload your web page to the server when ready. This
way, you can work on your web site offline and upload the changes when you are
done editing.
Click on the folder next to the box below Where on your computer do you want
to store your files? and navigate to the folder you have your web site
files in. If you haven't started one yet, navigate to a folder to put the new
folder in, and then type at the end of the text in the box a name for the new
folder. Click the Next button when you're done.
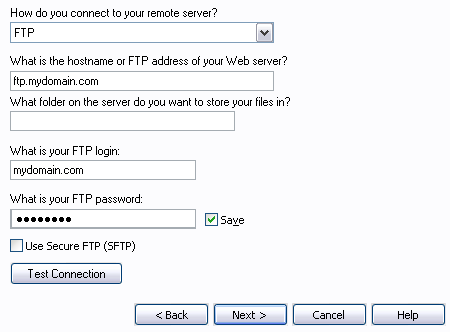
Now fill in your FTP information:
In the top box How do you connect to your
remote server?, click on the button next to the box and choose FTP.
For What is the hostname or FTP address of your Web Server? type in
ftp.mydomain.com (replace mydomain.com with your actual domain
name).
For What is your FTP login: type your actual domain name (such as
mydomain.com for example).
Type in your password for What is your FTP password: and be sure the
box next to Save is checked if you want the program to remember your
password so you don't have to type it in at each connect. Click the Next
button when done.
If only you are going to be useing the web site then select No, do not
enable check in and check out.

Uploading Your Files:
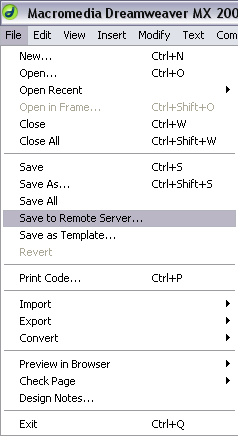
From the File Menu, select Save to Remote Server... From there
you can update your web site.
|

