Setting Up CuteFTP Home 6.0
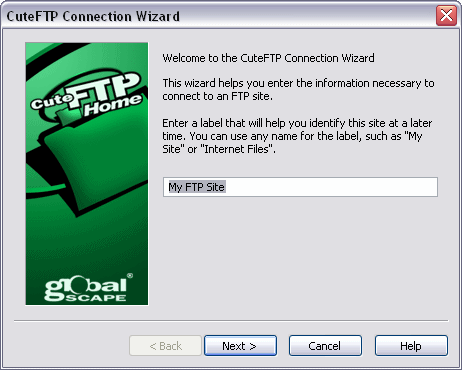
When you start CuteFTP for the first time, a wizard will appear. If it does not,
then skip to step 5. In the wizard, first fill in a name you wish to use to
identify your FTP connection with. A good idea would be to name it the same name
you choose for your web site, for example.
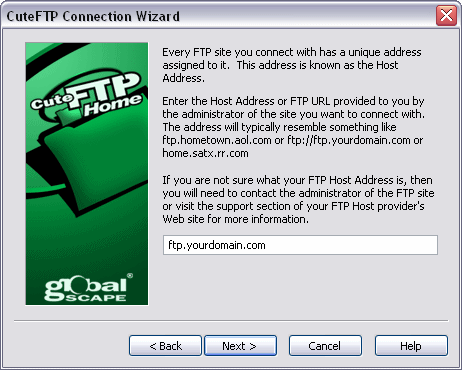
Fill in the FTP Host name. This is ftp.yourdomain.com where
yourdomain.com is your actual domain name.
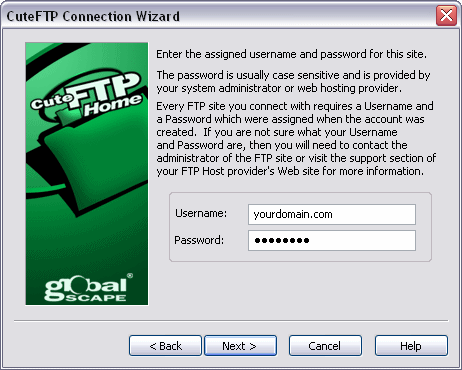
Fill in your actual domain name for the username, and fill in your password.
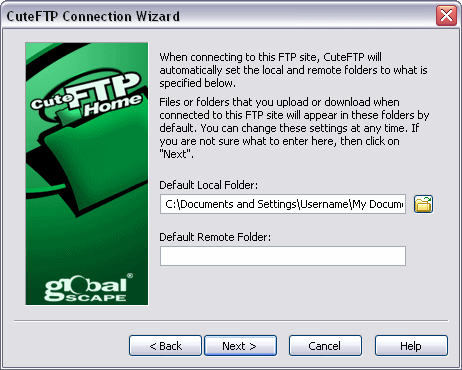
Click on the folder icon and browse to the folder you have saved your web page
files on your local hard drive. This way when you connect to your web space on
Active Web Hosting's servers, you will also automatically be taken the folder
you name here to make it easier to transfer your files. Next click the Finish
button. You are now set up.
Please skip to Step 7 if you completed Steps 1 - 4. If you did not see the Setup
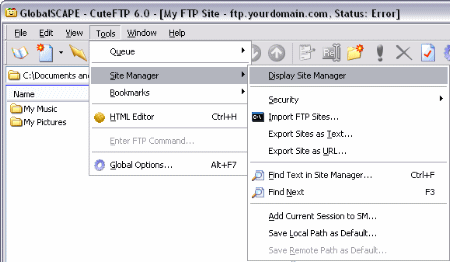
Wizard when you first started CuteFTP, then from the Tools Menu select
Site Manager and click on Display Site Manager.
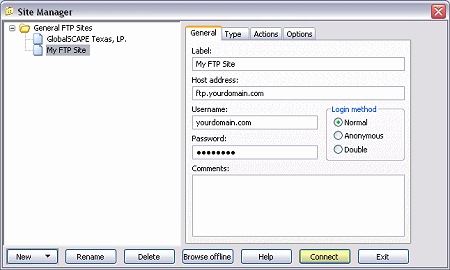
Type in a name for your FTP account. Also fill in the Host Address, which is
ftp.yourdomain.com where yourdomain.com represents your actual
domain name. Use your actual domain name as your username as well, and fill in
your password. When done you can either click Connect to go right to
your web space on Active Web Hosting's servers.
Transferring Files In CuteFTP:
To transfer files from your hard drive to your web space, first select the files
you wish to transfer from the left side. Hold down the CTRL key and click
on additional files you wish to transfer. Then drag and drop the files into the
web space area on the right.

When you are done transferring files, disconnect by clicking the Disconnect
Icon, which is the fifth icon from the left on the toolbar.
Using Other FTP Commands:
Changing Folders: If you wish to transfer files to another folder in your
web space, double-click on the folder in the web space window.
Deleting Files: To delete a file, right click on the file and select
Delete or press the Delete key.
Renaming Files: To rename a file, right click on the file and select
Rename or press the F2 key.
Creating A New Folder: Right Click in the web space window and select
New Folder and then click on Folder, or use the CTRL + M
key combination. Type in a new name for the folder.
To Change File Permissions or use CHMOD: If you are installing a file that
requires certain permissions to be set, right click on the file to change and
select Properties/CHMOD or press the ALT + ENTER key combination.
|

