Setting Up Core FTP LE 1.3c
Start the program. If it's your first time using it, choose No for all
questions and close dialog boxes.
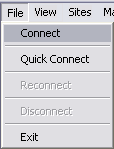
If the Site Manager is not showing, open it by going to the File
Menu and choosing Connect.

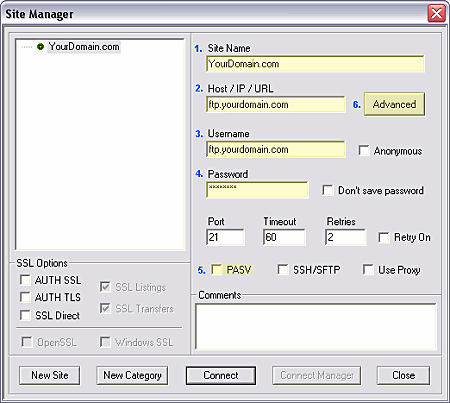
Fill in the following information:
Site Name: Type in a name for this site profile. A good choice would be
your domain name. If you are making an account for your CGI server, you may want
to note that in the name (ie. YourDomain.com CGI for example).
Host / IP / URL: For Web (FTP) Server: ftp.yourdomain.com or for
CGI server: cgi.yourdomain.com. Replace yourdomain.com with your
actual domain name.
Username: This will be yourdomain.com (replace with your actual
domain name).
Password: For Web (FTP) Server: Your FTP password. For CGI Server: Your
CGI password.
Uncheck PASV. Leave all other boxes unchecked.

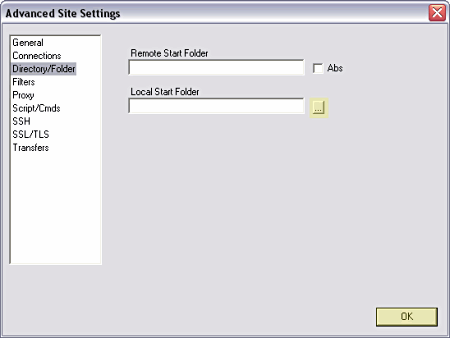
This step is optional. You can set up a default directory that the program goes
to so that you can always transfer files from that directory without having to
find it after you log in. Click the Advanced button. In the next window,
find Directory/Folder in the left side. Click on this to select it. Click
on the [...] button to the right of the bottom box marked Local Start
Folder. Find the folder where you normally keep your web site files on your
hard drive, and double click on that folder. Click the OK button when
done.

Click the Close button in the Site Manager when done.
Connecting To Your Site:
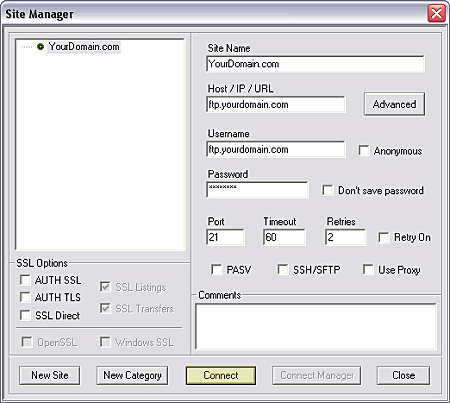
Click on the Site Manager Icon  or go to the File Menu and select Site Manager. Click on the site you want to
connect to from the left side Sites listing. Then click on the Connect
button on the bottom. Note that Windows XP may pop up a Firewall Security Notice
asking you if you want to block this program's connection to the internet. You
will need to click Unblock in order for Core FTP to work.

Transferring Files Core FTP:
Click on the file (or hold down the CTRL key and click on several files) to
upload. Right click in the left side file listing pane and choose Upload.
You can also click on the blue arrow pointing to the right above the left side
file listing pane, the last icon in the 2nd row. 
Using Other FTP Commands:
Changing Folders: Double click on the folder you wish to change to. If
you want to navigate to another drive from the left side file listing pane,
click on the directory tree icon  which is found just above the left side file listing pane, first icon in the
second row.
Deleting Files: Click on the file you wish to delete to select it, and
then right click on it to bring up a menu. Select Delete. This
works for directories as well.
Renaming Files: Click on the file you wish to rename to select it, and
then right click on it to bring up a menu. Select Rename. Type in
the new name for the file and click OK. This works for directories as well.
Creating A New Folder: Right click in the right side file listing pane.
Go to Direoctory Commands. Choose Make Directory. Type in the name
of the directory and click the OK button.
To Change File Permissions or use CHMOD: Click on the file you want to
change the permission of to select it, then right click on it to bring up
a menu. Choose Properties. You can type in the CHMOD value in the
Value box or click on the boxes next to the permissions you wish the file
to have. The easiest way is by typing in the value in the Value box. Most
of our tutorials give a CHMOD value for this. Click the OK button when
done.
Disconnecting From Your Site: When done, click on the Disconnect
icon  above the right side file listing pane. It's the 2nd last button in the top row.
|

