KMail 1.7.2 for Linux
KMail is a part of Kontact, a personal information manager for the KDE (K Desktop
Environment) for Linux. You can also start KMail from your program menu,
Internet, Mail menu.
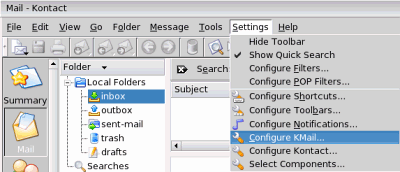
From the Settings menu, select Configure KMail
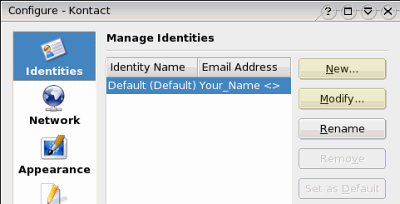
You should notice that Identities is selected in the left list. Select it
if it is not. In the right hand list, you can either select your default
identity and click Modify... button, or create a new one by clicking the
New button. For this tutorial, we are clicking the New button to
create a new identity or email account.
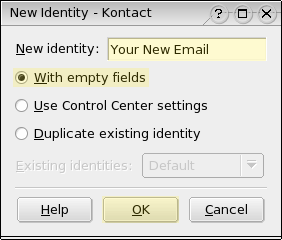
Type in a name for your new email account. Be sure With empty fields is
selected. Click the OK button.
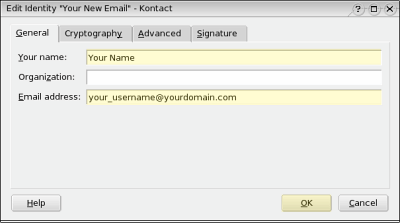
Type in your name and email address. Click the OK button.
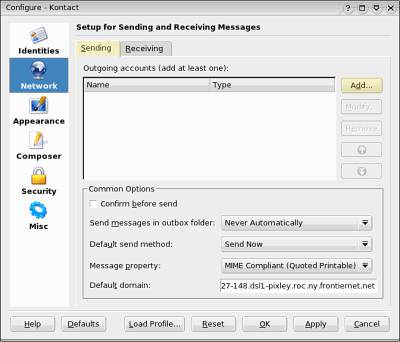
Click on the Network icon in the list on the left. Be sure the
Sending tab is selected on the right. Click the Add... button.
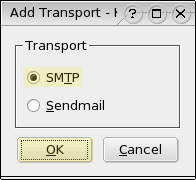
Select SMTP and click the OK button.
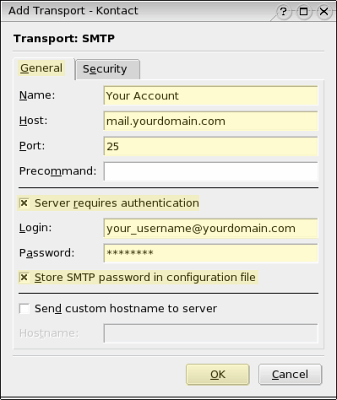
Fill in the following:
Name: A name to remember the account by.
Host: mail.yourdomain.com (replace yourdomain.com with your
actual host name)
Port: You can leave this at 25. However, if you are having problems
sending mail and/or your ISP doesn't allow you to send via an external host,
you can change this port number to 587, which may help you. Otherwise,
you will want to fill in your ISP host name for Host: instead.
Click in the box next to Server requires authentication.
Login: Enter your full email address, not just your username. If
you plan to send email from more than one email account on your domain, you may
want to create and use a specific email account (or one of the other email accounts)
for sending email. This will then use this account for all sending, and you'll
still recieve email from each account separately, regardless.
Password: If you are using your ISP's mail host to send, put the password
for your ISP email account here. Otherwise, use the password for the email
account that you are setting up for sending here.
If you would like to be able to send email without having to retype your
password each time, click in the box next to Store SMTP password in
configuration file.
Click the OK button.
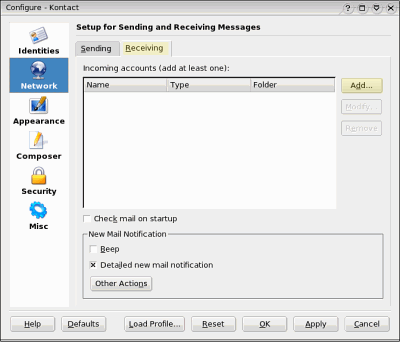
Click the Recieving tab, then click the Add... button.
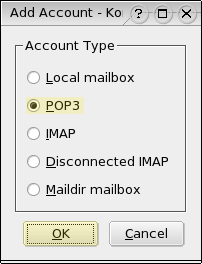
Select POP3, click the OK button.
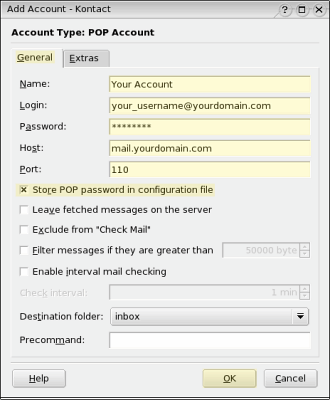
In the General tab, fill in the following:
Name: A name to remember the account by.
Login: your full email address, not just your username.
Passowrd: Your email account password.
Host: mail.yourdomain.com (Replace yourdomain.com with your
actual domain name.)
If you do not want to type your password each time you check your email, click
in the box next to Store POP password in configuration file.
Click the OK button when done. Click the OK button to exit the
configuration window.
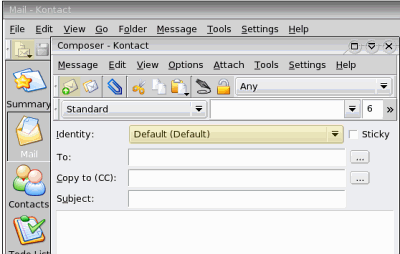
Now you can send or recieve email. To send email, click the New Mail icon
in the upper left. In the composition Window, pick your Identity in which
you want your recipient to see on your email message. Fill in the other fields
for To: (email of the person you're sending a message to), Subject, and message.
When ready, click the Send icon in the upper left. You may be asked for a
password before you can send email. If you checked to store the password in the
configuration above, then you'll only be asked for a password the first time you
send email from that account. The password will then be saved.
To check your email, click on the Check Mail In icon in the tool bar. If
you have more than one account set up, a drop down box will appear and you can
click on which one you'd like to check. You can also check all email
accounts by going into the File menu and selecting Check Mail or
using the CTRL+L keyboard shortcut. You may be asked for a password before you
can check email. If you checked to store the password in the configuration
above, then you'll only be asked for a password the first time you check email
from that account. The password will then be saved.

|

