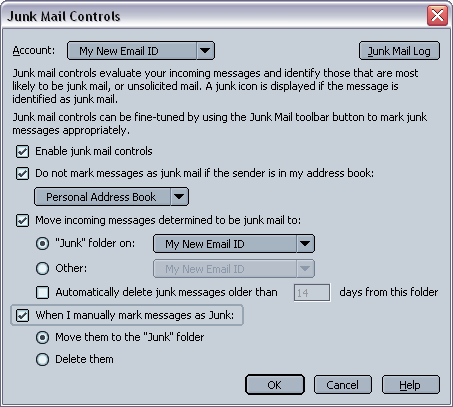
NOTE: Mozilla 1.7 was used in this tutorial.
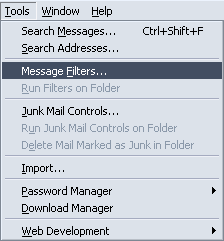
1. From the
Tools Menu, select
Message Filters.
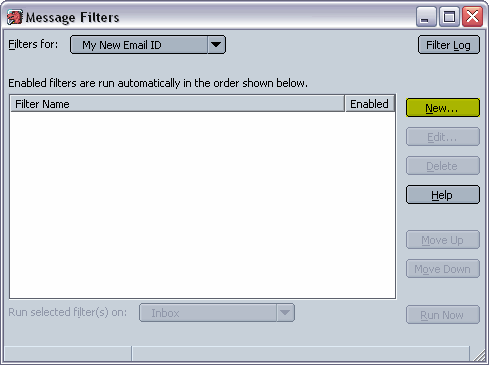
2. Click on the
New button.
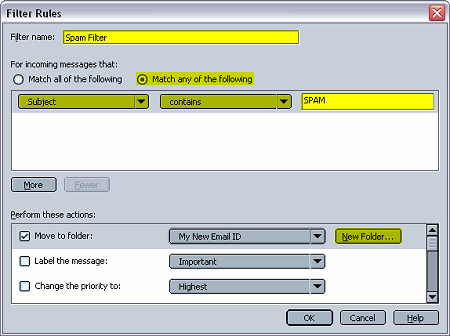
3. Fill in a name for the filter such as
Spam Filter or whatever you wish to
call the new filter. Next, make sure
Match any of the following is selected.
Use the drop down boxes below that to create a filter that says
Subject
contains SPAM. You will have to type in the word
SPAM in uppercase
letters in the box on the right. Note that we use this keyword because Active
Web Hosting's spam filtering will autotmatically put the word "SPAM" in the
subject line of any mail regarded as spam. You can use other keywords as well.
For more information on keywords to use in your filters, please see
Spam Keywords To Add To Your Filter Lists.
Finally, click on the
New Folder button.
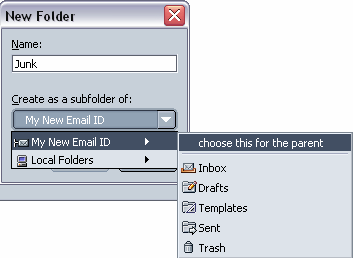
4. Type in the word
Junk or whatever you want to call your Junk E-Mail folder.
Click on the drop down box and select the account folder you wish to put it in,
move to the arrow on the right, and then
choose this for the parent.
Click the
OK button.
5. In the
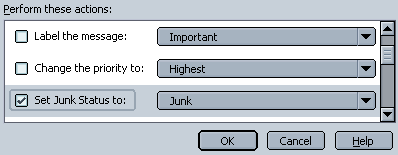
Perform these actions: area, scroll down to find and
click on the box next to
Set Junk Status to: From the drop down box,
find
Junk. Click the
OK button when done. You'll now see your new
filter added to the list. Click the "X" in the upper right of the window to
close it.
6. Mozilla also has a Junk Mail feature. To use it, go into the
Tools Menu
and select
Junk Mail Controls. The recommended settings are as follows:
Enable Junk Mail Controls should be checked.
The following should be selected and/or checked:
Do not mark messages as junk mail if the sender is in my address book: Personal
Address Book.
Move incoming messages determined to be junk mail to: "Junk" folder on: (your
current E-Mail account you are working with. This should match the same account
in the drop down box at the top of this settings window).
When I manually mark messags as Junk: Move them to the "Junk" folder.
Click the OK button when done.
